
Pressed flowers fade over time. They lose their color and crumble when you touch them.
Anyone who’s tried preserving blooms between book pages knows this frustration. But here’s the thing – a proper diy flower press changes everything.
You can create one at home without special skills or expensive supplies. Just a few simple materials and you’re ready to go.
This blog shows you exactly how to build your own flower press.
You’ll learn what materials work best, how to follow step-by-step assembly instructions, and tips for pressing different types of flowers.
By the end, you’ll have a tool that preserves your garden memories beautifully.
Essential Materials to Craft Your DIY Flower Press
Learning how to press a flower starts with gathering the right materials. You don’t need anything fancy or expensive. Most items are already sitting around your house.
Here’s what you’ll need:
| Material | Purpose | Where to Find It |
|---|---|---|
| Two wooden boards | Creates pressure for flattening | Hardware store or use old cutting boards |
| Cardboard sheets | Absorbs moisture from petals | Recycled boxes work great |
| Blotting paper | Protects flowers during pressing | Craft stores or use coffee filters |
| Bolts and wing nuts | Holds everything tightly together | Hardware store (4 sets needed) |
| Drill | Makes holes in wooden boards | Borrow from a neighbor if needed |
Step-by-Step Instructions
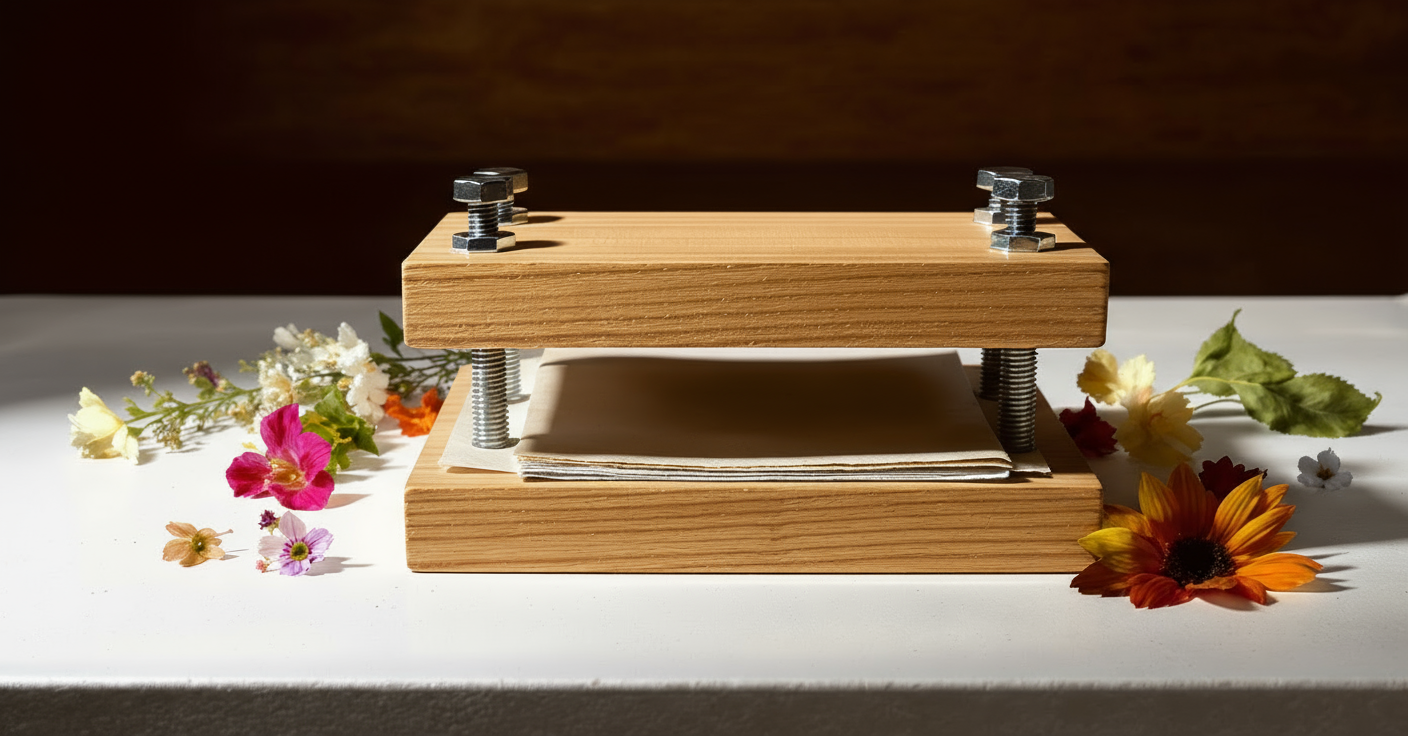
Building your own flower press is easier than you think. Follow these five simple steps and you’ll have it done in under an hour.
Let’s get started.
Step 1: Cut Your Wooden Boards to Size: Start with two wooden boards about 9×12 inches. Sand them down so there are no rough edges. Smooth surfaces work best for even pressure.
Step 2: Drill Holes in Each Corner: Mark spots about an inch from each corner. Drill holes through both boards at the same time. This keeps everything lined up perfectly.
Step 3: Layer Your Pressing Materials: Place cardboard on the bottom board. Add blotting paper on top of that. This creates the base where your flowers will sit.
Step 4: Insert Bolts Through the Holes: Push bolts up through the bottom board. Make sure they poke through all the layers. Leave the wing nuts off for now.
Step 5: Add the Top Board and Tighten: Place the second board over the bolts. Screw on the wing nuts and tighten them evenly. Your flower press is ready to use!
Pressing Perfection Techniques for Breathtaking Bloom
Getting perfect pressed flowers takes a bit of know-how. These techniques help you avoid common mistakes and get stunning results.
Try them out and see the difference.
1. Pick Flowers at the Right Time
Harvest blooms in late morning after the dew has dried. Flowers hold too much moisture early in the day.
Mid-morning blooms press flatter and keep their color better. Avoid picking after rain or watering.
- Best timing: 10 AM to noon works perfectly
- Weather matters: Choose dry, sunny days only
- Skip wilted blooms: Fresh flowers give the best results
2. Arrange Petals Before Pressing
Spread petals out carefully with tweezers. Make sure nothing overlaps or folds.
Flat petals dry evenly and look more natural. Take your time with this step; it really matters.
- Use tools: Tweezers help position delicate petals
- Face direction: Decide if you want front or side views
- Leave space: Don’t crowd multiple flowers together
3. Change Paper Every Few Days
Swap out blotting paper after 2-3 days. Old paper traps moisture and causes mold.
Fresh paper speeds up drying time. Your flowers will be ready in 2-3 weeks instead of a month.
- Check regularly: Peek every 48 hours for dampness
- Mark your calendar: Set reminders so you don’t forget
- Reuse paper: Dry it out and use it again
4. Press Similar Thickness Together
Group thin petals, like those of pansies, separately from thick roses.
Different thicknesses need different pressure levels. This prevents crushing delicate flowers. You’ll get better results across the board.
- Thin flowers: Daisies and violets need light pressure
- Thick blooms: Roses and peonies need more force
- Separate batches: Don’t mix different types
5. Store in Airtight Containers
Keep finished flowers in sealed containers with silica gel packets. Humidity is your enemy here.
Proper storage keeps colors bright for years. Label each container with the flower type and date.
- Container options: Glass jars or plastic boxes work well
- Add protection: Tissue paper between layers prevents damage
- Cool spots: Store away from windows and heat sources
How a Flower Press Ignites Limitless Creativity
Flower pressing opens up so many creative possibilities. You can make personalized greeting cards for friends and family.
Pressed blooms look beautiful in handmade bookmarks, too. Frame your favorite petals and hang them as wall art.
Some people use them in scrapbooks to preserve special memories. Others create unique jewelry pieces with tiny pressed flowers sealed in resin.
You can even decorate candles, phone cases, and journals. Each project tells a story. That rose from your first date. Wildflowers from a summer hike. Your grandmother’s garden blooms. Flower pressing turns simple petals into keepsakes you’ll treasure forever.
Kids love it too, making it a perfect family activity for rainy afternoons.
Pro Tips and Fixes for Flawless DIY Flower Press Wins
Even experienced crafters run into problems sometimes. These pro tips help you troubleshoot common issues and get better results every time. Here’s what works:
| Problem | Fix | Prevention Tip |
|---|---|---|
| Flowers turn brown | Change paper more often | Use fresh blotting paper every 2 days |
| Petals stick to paper | Add parchment between layers | Spray the parchment lightly with cooking spray lightly |
| Uneven pressure | Tighten wing nuts equally | Check tightness daily for the first week |
| Mold appears | Reduce moisture before pressing | Let flowers air dry for 30 minutes first |
| Colors fade quickly | Store away from sunlight | Keep in a dark drawer or cabinet |
| Petals crumble | The press wasn’t tight enough | Add extra cardboard for more pressure |
Ignite Your Floral Expedition and Press Memories Today
You now have everything you need to start preserving flowers. A DIY flower press is more than just a craft project.
It’s a way to hold onto special moments and create something beautiful. Those birthday bouquets, wedding flowers, and backyard blooms deserve to last forever.
Don’t let them fade away in a vase. Build your press this weekend and start making keepsakes you’ll cherish for years.
Your first pressed flower might not be perfect, and that’s totally fine.
Each one gets better with practice. Your garden is full of memories waiting to be saved.
Start pressing today and see what you can create!